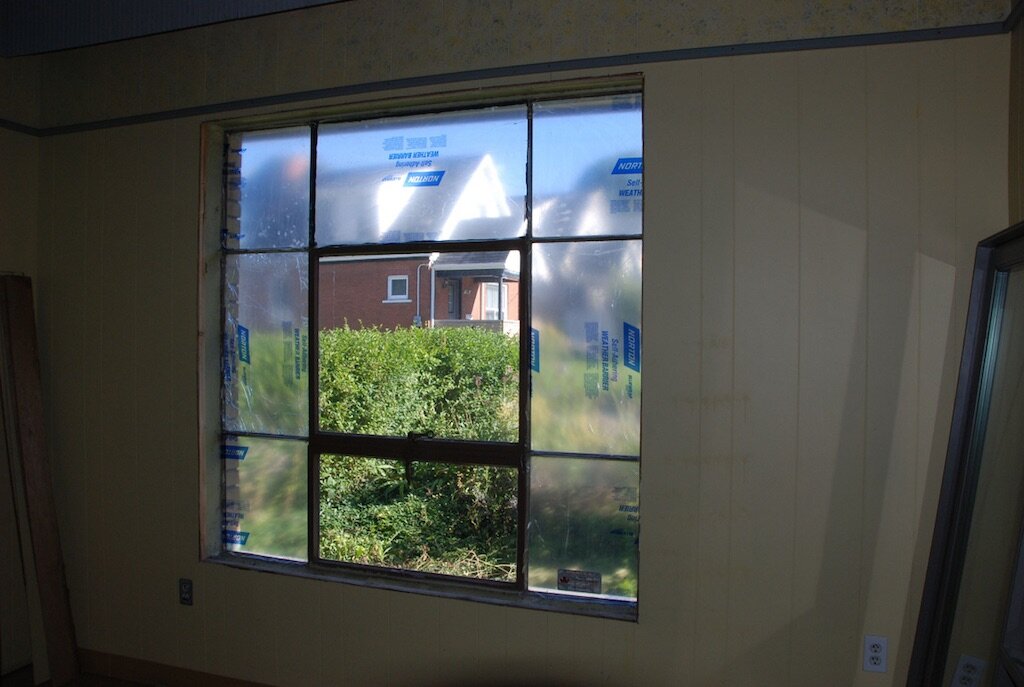
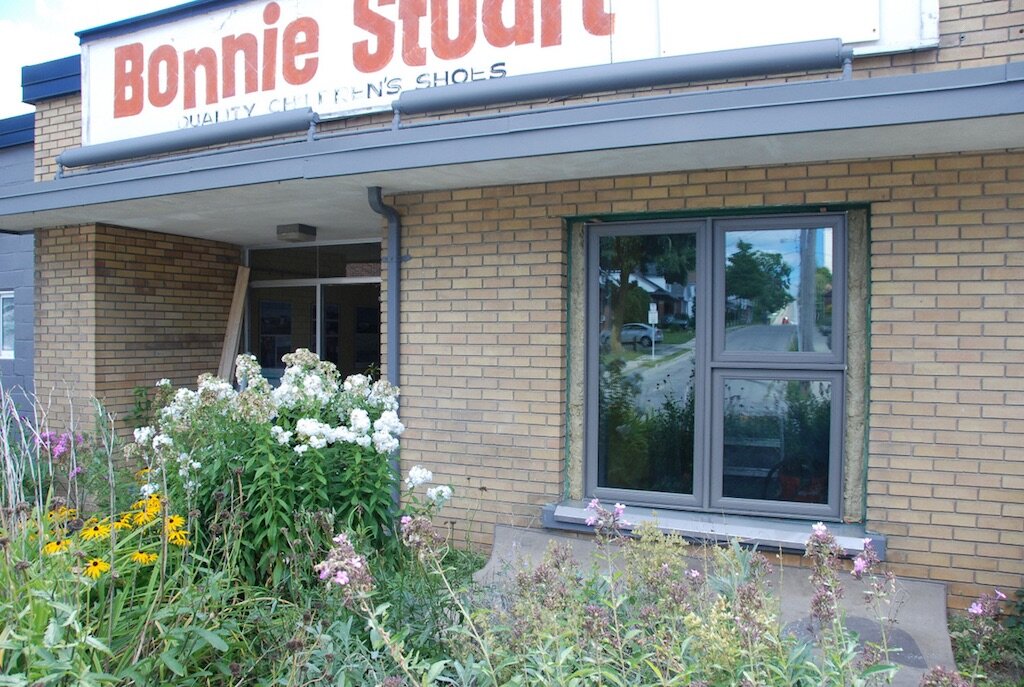
The JMA office endeavoured to replace one of the existing low performance windows in the office meeting room with a newer, higher performance model. The building in which JMA is located is the renovated Bonnie Stuart Shoe Factory. The building was originally built in 1910 and carried out its shoe making processes until 1997. Over the years, renovations have been carried out to adapt this older building to its current usage. Replacing the old single pane windows are a part of this ongoing process of renewal.
JMA staff undertook the exercise of replacing the window in our office Meeting Room as a training exercise. Given the many times that each of us have drawn window details, we thought that this would be a good way to get a better understanding of the steps involved in constructing those details. Through this we also hoped to find better ways to detail our windows, while still considering ease of installation.
John pioneered the detailing of the windows with Monica, a JMA intern. With the details in mind, John assembled the materials we’d need for installation, including stainless steel trim, adhesives, vapour barrier tape and in lieu of butyl tape (which the hardware was out of), a sticky, black, resinous tape. In order to first remove the existing window and trim, we gathered an assortment of hammers, pry bars and power tools.
Adhesive applied to glass to control glass as it shatters.
The construction team included John, Matt, Ashley and Lisa with Margaret as our occasional photographer. Our first steps involved preparing the new window for insertion into the opening as well as preparing the existing window for removal.
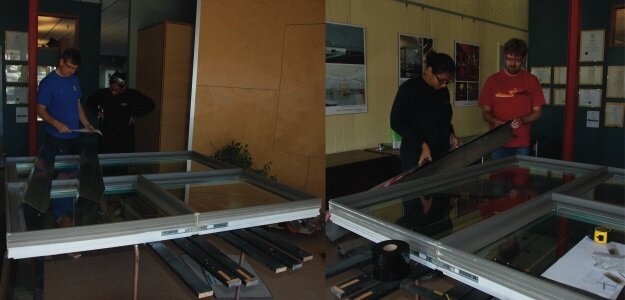
Preparation of new window with trim and resinous tape flaps.
While John and Lisa worked on applying resinous tape flaps to the new window, Ashley and Matt rose to the challenge of removing the existing window glass and muntins. They wielded power tools like professionals and applied brute force as necessary.
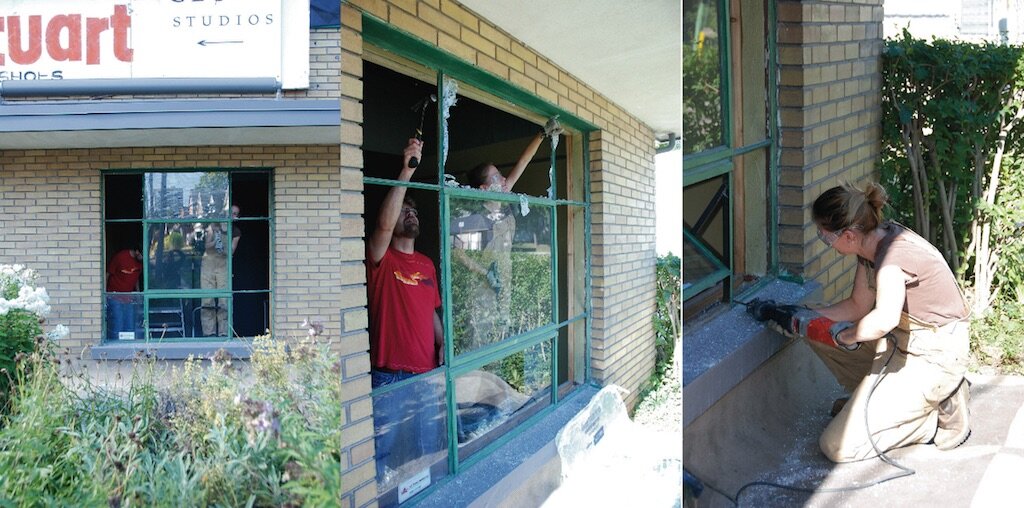
 Removal of the Existing Window .
After the muntins came free, John had to grind down the remaining steel edges in order to smooth the opening for the new window.
 John with Grinder.
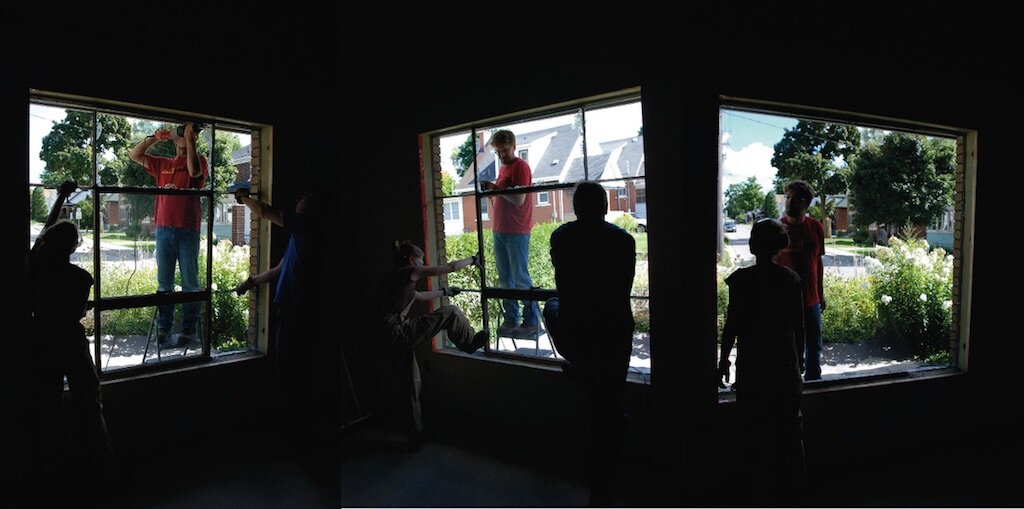
At that point, we were ready for the insertion of the new window. First, we ensured that insulation and blocking was installed at the bottom of the window opening. Then, since we attached the stainless steel trim to the window before hand, we lifted and fit the window into the available space with some thoughtful manoeuvring.
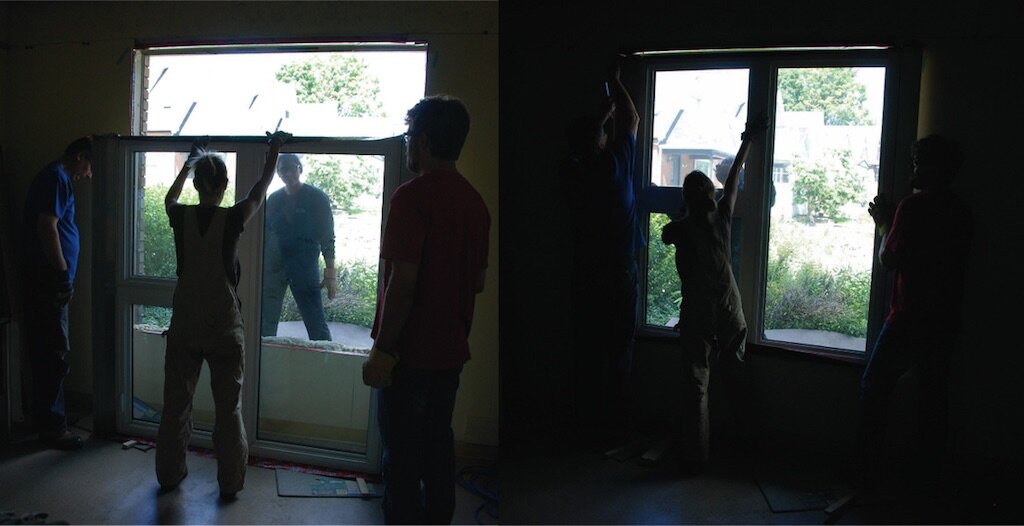 Installation with thoughtful manoeuvring.
Connecting the existing vapour barrier to the new one was a challenge that took some innovation. Once the window was in its opening, we all worked hard to ensure that the vapour barrier flaps connected on all sides and applied some extra to ensure that corners were well sealed. Rock wool insulation was then placed at the stainless steel trim.
 The new window installed.
Many lessons were learned for the next time we do this. There is one more window in the office that needs the same treatment as this one. Now that the team has a bit of experience, I am sure that the next installation, will be quicker and easier.
The running joke that morning was, "How many architects does it take to install a window?" Well, I’m here to tell you; it takes exactly four.


