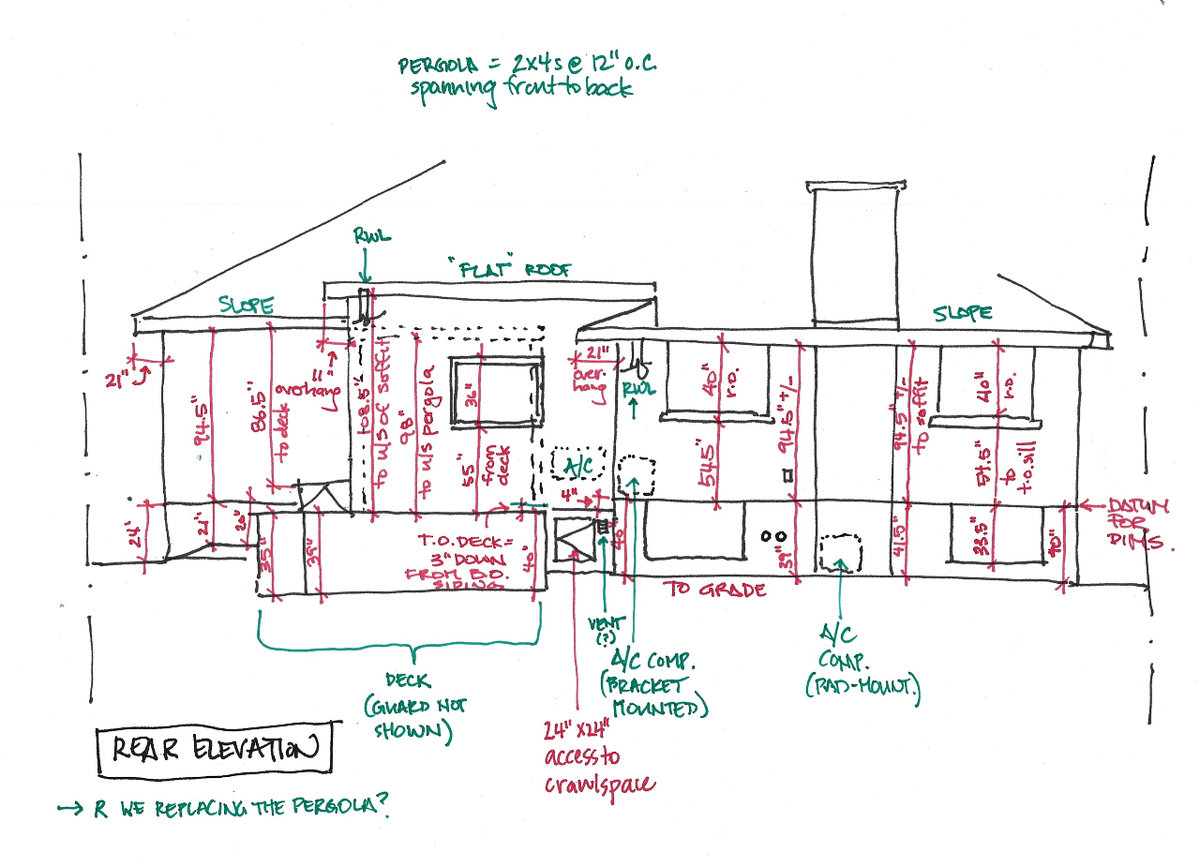
Rear house elevation with measurements
When accurate drawings don't exist, survey drawings must be done at the very beginning of every house renovation. They are the basis for realistic decision-making that responds well to the existing situation. When a couple of inches make the difference between being able to fit a door, or a washroom, the importance of good accurate drawings is evident. Unlike most architectural drawings, (done with a CAD program and sitting at our desks), these are done by hand and on site. The tools for this task haven't changed: a couple of steel measuring tapes (15' & 30') and a surveyor's tape at 100', clipboard, plenty of paper, pencils, eraser, sharpener and pens in various colours, a flashlight and a camera.
You might think that new technologies (laser measurers, and 3-D photography) have replaced this craft. The reality is that in a small house there are countless objects blocking access to whatever one is trying to measure: a giant fig tree next to a window; a mountain of laundry over a vent; floor to ceiling bookshelves; a dark basement or attic that requires that flashlight that we remembered to pack. A laser might be able to zap it all, but it can't work its way around them!
The challenge of these drawings is two-fold:
- The first challenge is ensuring that no details are missed.
When I was a student, I remember embracing the challenge of measuring EVERYTHING to the 1/8”: room sizes; wall thicknesses; ceiling heights; location, height and width of windows and doors; locations of vents, pipes, light switches, etc. Stairs where particularly challenging, having to capture all the details of the risers, treads, nosings, stringers, baluster, spindles, handrail and newel post, at the same time that I was learning their names. Kudos if I could measure the studs & joists and the distance between them (which is supposed to be standard, but often isn't) and if I could confirm the direction of the structure. I now appreciate unfinished basements for all the information that they provide. The exterior received the same scrutiny, regardless of the weather. Yes, I even measured one house after a big snow storm. When I thought I was done, I would review everything hoping that I hadn't forgotten to capture something, which of course I had. It meant a second trip to the site about a week later.
- The second challenge, as important as the first, is communicating all the information clearly.
Someone has to be able to interpret the information easily and correctly on these hand made drawings so they can transfer it to CAD drawings. I learned to draw confident looking lines and choose their weight to represent their purpose; words & digits neat and legible, using various colours & symbols to represent vertical & horizontal dimensions; proportion floor plans and elevations accurately; the placement of information on the page uncluttered. The finished product, while not a work of art, if it was easy to read and looked good, certainly gave a sense of satisfaction.
As a student of architecture, survey drawings were always a great learning opportunity allowing one to know houses intimately by observing, measuring and drawing every detail. This tried and true way to measure a house, is the first step towards realizing its potential and transforming it into one that will serve its inhabitants well.
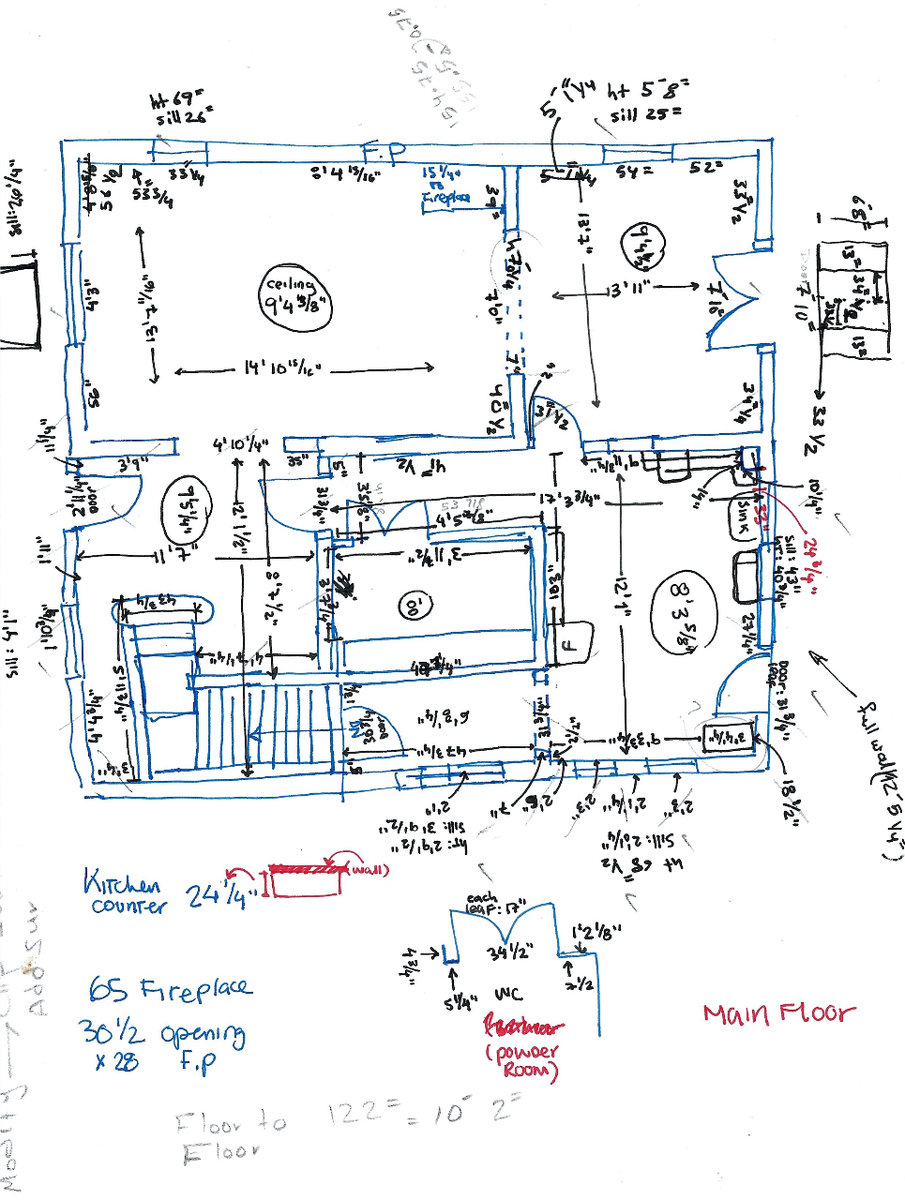
Floor plan with measurements


